This is my final post of 2011! I would have never thought at the beginning of last year that I would start a blog and it would be as successful as it has been! I've had readers from countries all over the world reading my blog! There is such a feeling of satisfaction to know that I might be helping someone around the world, I might have inspired someone to go to the doctor to get tested and finally get a solution to there problem.
Personally my year has been filled with a rollercoaster of emotions and bad luck, hospital visits, 2 surgeries and lots of pain from my accident. I had thought about blogging, as I was enjoying reading Lori's blog from RASHM and Emma, from What's in Emma's Brain.
I remember the moment that I decided I would start my blog, it was at a child's birthday party, and a conversation with Emma, who encouraged me to write the blog. I remember sitting at my house typing the very first post, setting up my blog and pressing the publish post button, I sat watching the amount of times that the post was viewed. I was amazed as the numbers of viewers dramatically went up and the excitement was even greater when I read that people from all over the world were reading my blog! As time continued, so did my readers and I was in total amazement at the amount of countries that my readers were coming from!
Even in times when I was too sick, or in too much pain to write my blog, my readers stood by me and where still there when I was back on my blogging feet again. I even had my mum and my husband type my blog, whilst I was lying in bed, or they were sitting next to me.I couldn't believe how much blogging had become a part of my life.
I remeber my first recipe I put up, it was a recipe from someone else, a cookbook or something, as my confidence began to grow, I began to develop more confidence in my cooking, in how flavours worked together, I began to make recipes from scratch, use a recipe as a base and work from there. I now find it difficult to work out how to write down recipes, cause I use a bit of this and a bit of that, that's how I know that my skills have improved. And I love that look on peoples face when they try your food and its like their eating a piece of heaven. That's when you know you have nailed a recipe.
Some of the nicest food I made this year was the Chocolate Baileys and Choc Cream Pavola, with berries (my creation), the Cherry Ripe Cake (Delicieux's creation, I just played around with the ingredients to make it gluten free), the Orange and Chocolate Cake (once again a marvellous recipe by Deliiceux, originally Nigella's) I added orange segments around the outside for decorations, The Chocolate, Almond and Butterscotch Schnapps Christmas Balls, my favourite main meal was probably the mustard encrusted roasted beef (my creation again), and finally the very last thing is the cocktail I created for a Nuffnang competition, a White Nectarine and Butterscotch Schnapps Cocktail (delicious, light and fluffy and not too strong).
It was only recently I joined the Twitter world, and here I came across many fellow food bloggers, both gluten free and standard food blogs! I can't believe how nice some of these lovely women are, Jennifer from Delicieux and JJ from 84thand3rd, I'm also reviewing an ebook for a fellow food blogger, Kim from Simply Natural Health, and Im sorry if I have missed anyone out, but thankyou to all the people that have helped me, let me particiapte in blog hops, which I have enjoyed so much and welcomed me with warm arms into the world of food blogging. I would also like to again thank Emma fro Whats In Emma's Brain for giving me the courage to start the blog and Lori fro RASHM (in a time of emotional turmoil, she gave me the time, to help me out with some beginners questions, for that I am so grateful). Before this point I was kind of feeling like a wall flower, sitting there in the blogging world, but now I have been welcomed by these lovely people, become part of a group, not so lonesome anymore!I also have to mention Nikki From Styling You, she has also welcomed and supported me with open arms! I look forward to joining more blog hops, more competitions and whatever else comes my way. I have to also thank again Jennifer from Delicieux for selecing me along with De Bortlio to be one of the 10 people to win some of their lovely wine, as promised I gave the wine to my best friend and my darling sister, the people who have driven me around and helped so much this years in more ways then words can mention! Thankyou girls, I love you both and am honoured to have you and my other very special circle of friends and family in my life, you know who you are.
I have also enjoyed reseraching the links between autism and the gluten and caesin free diet, the more I have discovered the more apparent it seems to me, that removing gluten and caesin (a protein in milk) has massive positive affects on children on the autism spectrum. With my education background, I also believe that if could have positive affects on children with various behaviour problems like ADHD and ODD, its a simple, non medication alternative. I never claim to be a medical professional, all I put forth is the research and I encourage you to try something for just a week and see if there are any differences, the pros for this so out weigh the cons!
My goals or resolutions for the New Year are as follows;
1. A revamp of my blog, to reach a wider population of readers
2. Follow some dreams I have about gf products and spreading my wings in the gluten free world, there is deinately a hole in the market out there, I hope you will see it all next year!
3. I want to get more of my reviews etc in published print, I've had one local review, its given me a taste for more.
4. I want to write a gluten free recipe book, either published or e-book.
5. To join the blogging world on a bigger scale, perhaps attend some conferences, get to do the fun things that I see other bloggers do!
6. To loose a bit of weight (the most common new years resolution!).
6. To continue doing things that make me happy.
7. A big lesson I have learnt this past year and a bit is that its in times of trouble and hardship, you really find out who your true friends are. I will and I recommend you, to do the same, surround yourself with the people who you love and who are there for you no matter what, in bad times as well as good.
I hope that next year brings me more good luck, good health and recovery. I hope that everyone who reads my blog gets enjoyment help, advice, recipes that they like and can use. I wish everyone good health, good personal contentment and personal happiness. So until next year, drink sensibly tonight, a hangover is not a great thing to have, frock up where ever you are and have some great fun. Remember to follow my blog if you have been reading this, it means so much to me! I get excited when I get a message from a reader or someone follows me or leaves a comment!
So to all Happy New Years Eve, good riddness 2011 and bring on 2012, I have a good feeling about next year! Tonight I'm making my Chocolate Moouse with Cherries soaked in cherry liquer, I will put up photos with the recipe next year. Have a safe night from the summer of Australia, to the freezing cold of Russia and everywhere in between I wish my readers all the best for the new year!
Saturday, 31 December 2011
Thursday, 29 December 2011
Is what we are eating causing massive health problems?
I love to cook! All types of cooking, I even made baked goods for family and friends this Christmas! Theres something special about the joy of someone else getting pleasure and enjoyment of food you have baked! I even adapted my great grandmothers 100+ year old recipe to make a gf Christmas Pudding!
The more I cook and enjoy it every day, the more im aware of the additives etc that are in store brought cakes, biscuits etc! If you make a cake or biscuits at home they only last for a few days, in a sealed container, maybe 5, but they won't last for months like the supermarket brands!
I look at the rates of cancer, which are currently 1 in 2 people will end up with cancer and I have to wonder why? This is a matter very close to my heart, I've lost 2 grandparents from this horrible disease and have many family memembers who have fought this disease!
Our parents and grandparents, particularly farming families like mine, were almost self sufficient! Take a step back 100 years and you made your own bread, cakes and slices, were all handmade, dinner was often rabbit (a meat killed by the men of the house, or women in some circumstances), nothing was spared, leftovers were used and re used and generally people were healthier! There was no flavour enhancers, little numbers on the back of products, it was only small stores in the city, no such thing as big supermarkets! In the city and country, there was a bread man, a milk man and a traveling salesman to buy things from!
What troubles me, is there were significantly less rates of cancer and other diseases! You have to wonder if all these additives, and mysterious numbers in foods are affecting our health dramatically!
I know that certain companies sell carcenogenic chemicals to large fast food operators, to go in there food! And it doesn't stop there,some wine companies use such chemicals to clean out their wine vats! All this ends up in our stomachs, processed through our bodies!
To me, it has to have some impact on our health, the cancer and disease rates! I even had a gf pudding brought for me, it tasted nice, then I looked at the additives and numbers on the back and I was slightly concerned!
Although even 100 years ago, coeliac disease would have existed, but it would have had a different name!
I'm glad that we live in an era where diseases like coeliac are recognized and treatable! But I think I'd much rather cook the majority of my food, to remove all the additives and nasty unknown products, then buy pre made food!
What's your thoughts on this? Do you agree with me or have another theory? I'd love to hear your comments!
Don't forget to follow me by clicking on the follow me tag or follow by email, I'm also on Twitter @MMOAGF and Facebook on the page Mishaps and Mayhem Of A Gluten Freee Life, just click the like button.
I await your comments!
Saturday, 24 December 2011
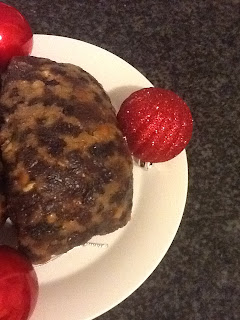
Old Fashioned GF Christmas Pudding!
Once again I'm participating in a blog hop, this one is focused on festive favourites and is hosted by 84th and 3rd! I'm very excited to pass my contributions to this blog hop for the second time! My festive recipe is something that has been passed down from generation to generation in my family. My mother even has to make the famous puddings in the same bowl her mother and grandmother used, it's over 100 years old and fine china! It's like one of the bowls that people used to wash in, my grandfather who if he was alive would be nearly 92, and he as a baby was bathed in it! It's truly amazing!

I refuse to carry it and am so scared when I help mum with my sister make the pudding, to stir the pudding on the off chance that I might crack or break this precious bowl! But mum insists that that is the bowl that we have to make the pudding in, for the rest of the year it's stored carefully away, wrapped in a towel, to ensure it doesn't get broken!
Last year, my first Christmas as a coeliac I didn't have the pudding. This year, I modified my great grandmothers recipe (she was the first generation to read and write), so it's highly likely that this recipe is much older and was passed down verbally, like we are doing now, with mother and daughters helping make the pudding and learning the special little tricks! That's why this recipe is so precious! It's a piece of my family history. So I didn't want to cook a pudding from any other recipe, I adapted this wonderful original recipe to be gluten free, so I could eat it! It was just a blending of flours and almond meal and I achieved the perfect balance! But the tricky part of the pudding is not the making, even though my mum made us do everything how her mum did! We made breadcrumbs from stale bread with our fingers, no blenders or mix masters, everything had to be done how it was done 100 years ago!
The hardest part of these puddings is boiling it constantly for 4-6 hours, constantly topping it up with boiling water, it must not come off the boil! Mum has cooked it on the barbeque, but there was problems with the wind, if you are cooking inside just be careful not to burn your stove top! I think grandma had the best idea, cooking in the garage on a camping stove!
It's not an easy recipe but is so moist, delicious and a real Aussie classic. My grandma and my great grandmother, used to put thruppences in the pudding, she did it when I was a child still! It originated from when people didn't have much money, so instead of spending copious amounts of money on gifts, like we do now, Christmas in my grandparents and great grandparents generations was more about spending time with family, having a delicious dinner and finally being able to eat this marvelous pudding that had been hanging in muslin cloth for weeks, the thruppences was the former currency in Australia, and getting these in your slice of pudding was your little present! Fortunately I still have thruppences but I didn't and wont be putting them in my pudding!
So from generations of my family I pass on to you a slightly modified gluten free version of this precious pudding! It's best to cook this about a month before Christmas, to let the flavors blended in, you can also freeze this marvelous pudding!
Traditional GF Christmas Pudding:
Ingredients:
250g butter (leave out at room temperature)
250g sugar 4 eggs (room temperature)
1/4 cup almond meal
1/2 cup gf plain flour
1/2 cup potato flour
1/2 cup dry stale gf breadcrumbs (leave out, tear into tiny pieces and remove crusts
1/2 cup raisins
1/2 cup sultanas
1/2 cup currants
60g mixed peel
60g dates
1/4 teaspoon baking powder
1/4 teaspoon bicarbote soda
1/2 teaspoon almond essence
1/2 teaspoon vanilla essence
1/2 teaspoon lemon essence
1/4 cup OP or normal rum
3/4 teaspoon mixed spice (or if no mixed spice 1/2 teaspoon nutmeg, 1/2 teaspoon cinnamon, 1/4 teaspoon ginger)
1/4 teaspoon ginger
30cm calico cloth
Method:
Chop and soak fruit, essence, and rum for a min overnight (better for a few days). Sift flours and dry ingredients, add sugar, rub in butter (best with cold hands), until mixed through. Beat eggs well, until they are light and creamy and 3/4 of way up the bowl, mix in gradually to dry ingredients. Add fruit grudully, stirring well. Rub gf flour into cloth to cover about 8cm from sides, with more flour in the centre. Place cloth in a colander or bowl. Place mixture in centre of cloth, gather ends together and tie securely with string as close to mixture as possible, leaving a small break (1-2cm), to allow pudding to swell. Tie cloth and put in boiling water for 3-4 hours. Continue to add boiling water every 30 minutes, don't allow to boil dry. Puddings are best made a month or so before Xmas and can freeze. Wrap in glad wrap and finish off with a layer of foil. These puddings can store for months in the freezer and taste great 6 months later! Serve with ice cream and brandy custard, and you get to eat pudding just like everyone else! Im storing half in the freezer and half for Christmas day, the frozen half has actually shrunk, don't stress, thats what it is meant to do.
Enjoy from my family a precious recipe to yours! I did notice when eating last night it was slightly crumbly, it tastes perfect tho! I'll play around with the flour combo next year and keep you all updated! Hope everyone had a Merry Christmas!
I refuse to carry it and am so scared when I help mum with my sister make the pudding, to stir the pudding on the off chance that I might crack or break this precious bowl! But mum insists that that is the bowl that we have to make the pudding in, for the rest of the year it's stored carefully away, wrapped in a towel, to ensure it doesn't get broken!
Last year, my first Christmas as a coeliac I didn't have the pudding. This year, I modified my great grandmothers recipe (she was the first generation to read and write), so it's highly likely that this recipe is much older and was passed down verbally, like we are doing now, with mother and daughters helping make the pudding and learning the special little tricks! That's why this recipe is so precious! It's a piece of my family history. So I didn't want to cook a pudding from any other recipe, I adapted this wonderful original recipe to be gluten free, so I could eat it! It was just a blending of flours and almond meal and I achieved the perfect balance! But the tricky part of the pudding is not the making, even though my mum made us do everything how her mum did! We made breadcrumbs from stale bread with our fingers, no blenders or mix masters, everything had to be done how it was done 100 years ago!
The hardest part of these puddings is boiling it constantly for 4-6 hours, constantly topping it up with boiling water, it must not come off the boil! Mum has cooked it on the barbeque, but there was problems with the wind, if you are cooking inside just be careful not to burn your stove top! I think grandma had the best idea, cooking in the garage on a camping stove!
It's not an easy recipe but is so moist, delicious and a real Aussie classic. My grandma and my great grandmother, used to put thruppences in the pudding, she did it when I was a child still! It originated from when people didn't have much money, so instead of spending copious amounts of money on gifts, like we do now, Christmas in my grandparents and great grandparents generations was more about spending time with family, having a delicious dinner and finally being able to eat this marvelous pudding that had been hanging in muslin cloth for weeks, the thruppences was the former currency in Australia, and getting these in your slice of pudding was your little present! Fortunately I still have thruppences but I didn't and wont be putting them in my pudding!
So from generations of my family I pass on to you a slightly modified gluten free version of this precious pudding! It's best to cook this about a month before Christmas, to let the flavors blended in, you can also freeze this marvelous pudding!
Traditional GF Christmas Pudding:

Ingredients:
250g butter (leave out at room temperature)
250g sugar 4 eggs (room temperature)
1/4 cup almond meal
1/2 cup gf plain flour
1/2 cup potato flour
1/2 cup dry stale gf breadcrumbs (leave out, tear into tiny pieces and remove crusts
1/2 cup raisins
1/2 cup sultanas
1/2 cup currants
60g mixed peel
60g dates
1/4 teaspoon baking powder
1/4 teaspoon bicarbote soda
1/2 teaspoon almond essence
1/2 teaspoon vanilla essence
1/2 teaspoon lemon essence
1/4 cup OP or normal rum
3/4 teaspoon mixed spice (or if no mixed spice 1/2 teaspoon nutmeg, 1/2 teaspoon cinnamon, 1/4 teaspoon ginger)
1/4 teaspoon ginger
30cm calico cloth
Method:
Chop and soak fruit, essence, and rum for a min overnight (better for a few days). Sift flours and dry ingredients, add sugar, rub in butter (best with cold hands), until mixed through. Beat eggs well, until they are light and creamy and 3/4 of way up the bowl, mix in gradually to dry ingredients. Add fruit grudully, stirring well. Rub gf flour into cloth to cover about 8cm from sides, with more flour in the centre. Place cloth in a colander or bowl. Place mixture in centre of cloth, gather ends together and tie securely with string as close to mixture as possible, leaving a small break (1-2cm), to allow pudding to swell. Tie cloth and put in boiling water for 3-4 hours. Continue to add boiling water every 30 minutes, don't allow to boil dry. Puddings are best made a month or so before Xmas and can freeze. Wrap in glad wrap and finish off with a layer of foil. These puddings can store for months in the freezer and taste great 6 months later! Serve with ice cream and brandy custard, and you get to eat pudding just like everyone else! Im storing half in the freezer and half for Christmas day, the frozen half has actually shrunk, don't stress, thats what it is meant to do.
Enjoy from my family a precious recipe to yours! I did notice when eating last night it was slightly crumbly, it tastes perfect tho! I'll play around with the flour combo next year and keep you all updated! Hope everyone had a Merry Christmas!
Tuesday, 20 December 2011
Chocolate, Almond & Butterscotch Schnapps Christmas Balls
I am once again participating in a Blog Hop, this time its a Festive theme, hosted by the lovely lady behind http://www.84thand3rd.com , a great food blogger! I have at least 2 entries in this Blog Hop, so I better get this started! A festive favorite in my family since I was a little girl was chocolate or rum balls! I have fond memories of cooking the chocolate balls with both my mum, Aunty and grandma! The best and most fun part as a kid was rolling the balls together, getting chocolate and coconut stuck on your fingers and licking then off when you were finished!
As we got older and became teenagers, it was trying to sneak a rum ball before mum or another grown up busted you! I'm sure the 1 tablespoon of rum in a whole batch was hardly enough to do anything! But with any teenager,it's the thrill of tasting something with alcohol and knowing your not really meant to be eating them!
The funny thing, is there is nothing specifically festive about these balls, but Christmas is the only time of the year that we make these delicious treats, maybe it's the coconut that gives it the Christmas feel!
This year I made some for friends, I decided to make some modifications to the original recipe, I added some almond meal and instead of rum I used butterscotch schnapps, a favorite drink of my friends I was making them for!
The worst thing for me was I made them with gluten biscuits, so I couldn't sample the mixture! But I'm writing this recipe out as gf, as I have a packet of gf arrowroot biscuits in the cupboard, to make these delicious Christmas balls with! Chocolate, almond & Butterscotch Schnapps!
Chocolate, Almond & Butterscotch Schnapps Christmas Balls
Ingredients:
I packet gf plain biscuits (I'm using arrowroot gf biscuits)
I tin condensed milk
1/2 cup desicatted coconut
1/2 cup almond meal
2 tablespoons of cocoa
2 tablespoons (or a slug) of Butterscotch Schnapps, to your liking
Additional desicatted coconut
Method:
1. Break individual biscuits into small pieces, place in an electric mixer and blend until there are only small pieces, a very fine substance.
2. Add remaining ingredients and mix well in a bowl.
3. Place additional coconut on a plate and have a separate plate for ready made balls.
4. (this is the messy part), remove rings and jewllrey. Using your hands, roll mixture into medium to small balls, roll in coconut and place on fresh plate. Complete until all mixture is gone!
5. Place plate of made balls, in the fridge.
6. Serve and put in a bowl, or in a box with baking paper if it's a gift and decorate with ribbon or a or a bowl!
Note: you can also make this version without alochol, simply remove from ingredients and they are chocolate balls, still very tasty! To make the gluten version, simply use plain biscuits and follow the same method for the rest of the recipe (if your making for friends and you ate a coeliac don't be tempted to lick your fingers or the bowl! (just remember the puffer fish!)Also the original recipe did not have almond meal, just 1 cup of coconut, so if you have only coconut in the cupboard the recipe will work out fine!
Enjoy and Merry Christmas, Happy Baking xx
Sunday, 18 December 2011
Gluten Free Chocolate Cherry Ripe Cake
As you know from previous posts, I have recently joined twitter and made a whole new array of friends, fellow food bloggers. One of the lovely food bloggers, LeDelicieux made a wonderful cherry ripe cake!
It was recently my one year wedding anniversary and I wanted to make something special for my husband, aka Poppa Smurf! The challenge I had was to adapt this marvellous recipe to gluten free, which is becoming easier as I cook more and get to know textures and tastes and the overall appearance!
Gluten free baking isn't always a success and often takes many attempts to get the various dishes right! Often cakes flop, pastries fall apart, biscuits crumble. It's about not giving up! Its about giving it that second or third go, adjusting the ingredients, adding a bit more flour, a different blend, more butter, eggs etc. My advice is persevere, home cooking is much tastier than packet mix or frozen food! When you get the gluten free recipe right, your own cooking, you and your friends and family won't be able to tell the difference between gf and gluten filled food. Bread is the only exception, but pretty much everything else you can make to taste like the original gluten recipe you based it from!
Back to the special Cherry Ripe recipe, derived from the marvellous Delicieux, fantastic food blogger, the link to her site is here http , a must look at! ://www.ledelicieux.com
I wanted to bake the cake in a heart shaped tin, very romantic! Unfortunately I could only find 4 small heart tins, thus I had heaps of mixture left over! What to do???? I quickly decided to get the muffin tins and Xmas cup cake holders out! I was amazed by how much mixture this cake made!I had about 24 large cupcakes that the mixture made! I made these all at the same time, they took roughly 30 minutes to cook, just keep on checking with a skewer!
This recipe is something that you don't try cooking when you don't have much time, with preparation, cooking, cooling, making the butter cream filling, cutting the cakes, filling them and making the ganache, finally coating the cakes with the ganache, decorating with a cherry ripe or fresh cherries, you are looking at 2-3 hours in total! But very well worth it, with the first mouthful, your efforts will be rewarded!
Without further ado here is the adapted:
GF Cherry Ripe Cake (thanks Delicieux for the wonderful cake!)
 Ingredients:
Cake:
Butter for greasing pans
1/2 cup gf cornflour
1/2 cup arrowroot flour
3/4 cup rice flour
2 cups sugar
3/4 cup good quality cocoa (I used Cadburys)
2 teaspoons of bicarbonate soda (baking soda)
1 teaspoon of baking powder
1 teaspoon salt
1 3/4 cups of Coconut milk (1 large tin was enough)
1/2 cup olive oil (original recipe calls for vegetable oil but I only had olive oil,I think for gf olive is the best)
2 extra large eggs at room temperature (this is important, it can really affect the cake!)
1 teaspoon of vanilla extract
1/4 cup cherry liqueur (I used Continental cherry liqueur, whatever cherry flavoured liqueur or brandy you can find)
200g glace cherries (a packet), finally chopped
1 cup of shredded coconut
Cherry Coconut Butter cream:
125g room temperature butter cut into cubes
1 cup of icing sugar
200g glace cherries, finely chopped
1/4 cup shredded coconut
2 teaspoons of cherry liqueur (or a small slug)
Red food colouring (optional, I used it and it looked great, just a few drops!)
Chocolate Ganache:
1 cup of non thickened cream
300g dark chocolate chopped
1 tablespoon of cherry liqueur (optional)
Method:
1.start with the cake I used muffin tins, you will need at least 24, with maybe a second batch! Best thing about muffin tins is you use cupcake holders, so you don't have to worry about greasing tins! Preheat the oven to 175 degrees Celsius (350degress Fahrenheit)
2. Sift the flours, cocoa,bicarbonate soda, baking powder and salt. Place in an electric mixer with a paddle attachment, add the sugar and mix on low speed until it's mixed through.
3.In another bowl, whisk the eggs, coconut milk, oil and cherry liqueur. With the mixer on low speed slowly add these ingredients to the dry ingredients until mixed through.
4. With mixer on low add the coconut and cherries until just combined.
5. Pour batter into muffin tins, or to make a big cake use 2 20cm tins (my advice is cupcakes/muffins are the best size, due to the sweetness and richness of this cake)and bake for between 20-30 minutes if using muffins, check regularly with skewer as they cook quicker than a larger cake. It's cooked when the skewer comes out clean.
6.Cool in the pan for 30 minutes or more, even put in fridge or freezer to make then easier to cut in half!
7. For the cherry butter cream mix butter and icing sugar until light and fluffy. Add the food colouring and mix well. Add glace cherries, coconut and cherry liqueur, mix to combine.
8.For the chocolate ganache, use a double saucepan, the larger one filled with a bit of water and place broken chocolate, cream over low heat until melted, add liqueur, set aside until the chocolate thickens and reaches room temperature.
9. Cut cupcakes in half and fill with Butter cream, place the other half of the muffin on tip of the other half. Using 2 tablespoons pour chocolate ganache completely over the cakes, letting it run slowly down the sides.
10. Decorate with cherry ripes, fresh or glace cherries. I used a cherry ripe cut into very small pieces, 1 on each cupcake/muffin.
Note: to overseas readers Cherry Ripes are an Australian chocolate, they taste exactly like this cake! Very yummy! A great Christmas gift, anniversary or special occasion! A guaranteed hit!
Thanks again to Jennifer at LeDelicieux, a great food blogger, for making the original version of this amazing cake and for allowing me to post my modified gluten few version, for all people to enjoy. This is definitely a recipe that you can't tell is gluten free and is gobbled up by all!
Enjoy and let me know how you go! Don't forget the great competition at Delicieux to win 1 of 4 $100 vouchers from the best restaurants in Australia, only hours to go and the other amazing competition to win 6 bottles of Fresita Strawberry flavoured wine, definitely enter!
Remember you can follow me on twitter @MMOAGFL, dint forget you can like my page on Facebook and don't just read, follow, even privately via email (you get each new blog post or recipe sent directly to your own email account),
It was recently my one year wedding anniversary and I wanted to make something special for my husband, aka Poppa Smurf! The challenge I had was to adapt this marvellous recipe to gluten free, which is becoming easier as I cook more and get to know textures and tastes and the overall appearance!
Gluten free baking isn't always a success and often takes many attempts to get the various dishes right! Often cakes flop, pastries fall apart, biscuits crumble. It's about not giving up! Its about giving it that second or third go, adjusting the ingredients, adding a bit more flour, a different blend, more butter, eggs etc. My advice is persevere, home cooking is much tastier than packet mix or frozen food! When you get the gluten free recipe right, your own cooking, you and your friends and family won't be able to tell the difference between gf and gluten filled food. Bread is the only exception, but pretty much everything else you can make to taste like the original gluten recipe you based it from!
Back to the special Cherry Ripe recipe, derived from the marvellous Delicieux, fantastic food blogger, the link to her site is here http , a must look at! ://www.ledelicieux.com
I wanted to bake the cake in a heart shaped tin, very romantic! Unfortunately I could only find 4 small heart tins, thus I had heaps of mixture left over! What to do???? I quickly decided to get the muffin tins and Xmas cup cake holders out! I was amazed by how much mixture this cake made!I had about 24 large cupcakes that the mixture made! I made these all at the same time, they took roughly 30 minutes to cook, just keep on checking with a skewer!
This recipe is something that you don't try cooking when you don't have much time, with preparation, cooking, cooling, making the butter cream filling, cutting the cakes, filling them and making the ganache, finally coating the cakes with the ganache, decorating with a cherry ripe or fresh cherries, you are looking at 2-3 hours in total! But very well worth it, with the first mouthful, your efforts will be rewarded!
Without further ado here is the adapted:
GF Cherry Ripe Cake (thanks Delicieux for the wonderful cake!)

Cake:
Butter for greasing pans
1/2 cup gf cornflour
1/2 cup arrowroot flour
3/4 cup rice flour
2 cups sugar
3/4 cup good quality cocoa (I used Cadburys)
2 teaspoons of bicarbonate soda (baking soda)
1 teaspoon of baking powder
1 teaspoon salt
1 3/4 cups of Coconut milk (1 large tin was enough)
1/2 cup olive oil (original recipe calls for vegetable oil but I only had olive oil,I think for gf olive is the best)
2 extra large eggs at room temperature (this is important, it can really affect the cake!)
1 teaspoon of vanilla extract
1/4 cup cherry liqueur (I used Continental cherry liqueur, whatever cherry flavoured liqueur or brandy you can find)
200g glace cherries (a packet), finally chopped
1 cup of shredded coconut
Cherry Coconut Butter cream:
125g room temperature butter cut into cubes
1 cup of icing sugar
200g glace cherries, finely chopped
1/4 cup shredded coconut
2 teaspoons of cherry liqueur (or a small slug)
Red food colouring (optional, I used it and it looked great, just a few drops!)
Chocolate Ganache:
1 cup of non thickened cream
300g dark chocolate chopped
1 tablespoon of cherry liqueur (optional)
Method:
1.start with the cake I used muffin tins, you will need at least 24, with maybe a second batch! Best thing about muffin tins is you use cupcake holders, so you don't have to worry about greasing tins! Preheat the oven to 175 degrees Celsius (350degress Fahrenheit)
2. Sift the flours, cocoa,bicarbonate soda, baking powder and salt. Place in an electric mixer with a paddle attachment, add the sugar and mix on low speed until it's mixed through.
3.In another bowl, whisk the eggs, coconut milk, oil and cherry liqueur. With the mixer on low speed slowly add these ingredients to the dry ingredients until mixed through.
4. With mixer on low add the coconut and cherries until just combined.
5. Pour batter into muffin tins, or to make a big cake use 2 20cm tins (my advice is cupcakes/muffins are the best size, due to the sweetness and richness of this cake)and bake for between 20-30 minutes if using muffins, check regularly with skewer as they cook quicker than a larger cake. It's cooked when the skewer comes out clean.
6.Cool in the pan for 30 minutes or more, even put in fridge or freezer to make then easier to cut in half!
7. For the cherry butter cream mix butter and icing sugar until light and fluffy. Add the food colouring and mix well. Add glace cherries, coconut and cherry liqueur, mix to combine.
8.For the chocolate ganache, use a double saucepan, the larger one filled with a bit of water and place broken chocolate, cream over low heat until melted, add liqueur, set aside until the chocolate thickens and reaches room temperature.
9. Cut cupcakes in half and fill with Butter cream, place the other half of the muffin on tip of the other half. Using 2 tablespoons pour chocolate ganache completely over the cakes, letting it run slowly down the sides.
10. Decorate with cherry ripes, fresh or glace cherries. I used a cherry ripe cut into very small pieces, 1 on each cupcake/muffin.
Note: to overseas readers Cherry Ripes are an Australian chocolate, they taste exactly like this cake! Very yummy! A great Christmas gift, anniversary or special occasion! A guaranteed hit!
Thanks again to Jennifer at LeDelicieux, a great food blogger, for making the original version of this amazing cake and for allowing me to post my modified gluten few version, for all people to enjoy. This is definitely a recipe that you can't tell is gluten free and is gobbled up by all!
Enjoy and let me know how you go! Don't forget the great competition at Delicieux to win 1 of 4 $100 vouchers from the best restaurants in Australia, only hours to go and the other amazing competition to win 6 bottles of Fresita Strawberry flavoured wine, definitely enter!
Remember you can follow me on twitter @MMOAGFL, dint forget you can like my page on Facebook and don't just read, follow, even privately via email (you get each new blog post or recipe sent directly to your own email account),
Monday, 12 December 2011
A big thankyou
Just a quick post to say a big thankyou to ledelicieux for winning the DeBortlio wine price! It made my day! For those of you who have read my accident post, you are aware of my injuries.
These lovely bottles of wine are going to the amazing friends and family, my support network who have helped me get through this hard time, driving me around, listening, being a shoulder to cry on!
I also want to give a big shout out to the chefs and staff at Tahmoor Inn, we had dinner there tonight, the chef made a gf sauce for me, they came out to tell me there was batter on the chips, so I had veggies! It made for a great dining experience and also proves it doesn't matter how fancy the restaurant is, it's about the willingness and knowledge of the chef to help you out!
I had a similar experience at Camden Bowling Club, the chef was very accomodating and kept on coming and checking I could eat certain things! Brilliant service and a place where you are guaranteed to have a gf meal and know with confidence that you won't have a reaction!
Keep an eye out on this blog for a delicious gf cherry ripe cake recipe!
Don't forget to follow me or get the blog posts by email, you can follow me on twitter too @MMOAGFL!
Thanks again LeDelicieux and DeBortlio for giving me a wonderful prize! Xxx
Saturday, 10 December 2011
Gf fruit n nut health bars!
One of the problems I find with being a coeliac is the lack of variety of snacks! I know there are some delicious biscuits and yummy chips, but when you are trying to be healthy and keep an eye on your weight, they aren't the most ideal snacks.
Also I love baking, obviously, as I wouldn't have started a food blog! But I have a habit of making delicious, sweet tasting treats! I end up eating way too much of this food! Again not so good for the waste line, particularly as my injuries very much limit my ability to exercise and burn off the calories I have digested.
So I set out to make a healthy snack bar, like a muesli bar, something that I can eat, without worrying too much on the calories. My first attempt was based on the popcorn pudding recipe that features on the deserts page, this was tasty but not a success for what I was after (I think the milk had something to do with it!).
My second attempt was a few days ago, inspired to create something delicious and healthy for my new readers and followers on twitter (which has been a large success, and given me amazing contacts!), I flicked through my gf cookbooks for inspiration.
What I created was based on a recipe from The Gluten Free Bible, but I made a few changes. Firstly the original recipe asked for a block of dark chocolate to be swirled across the top, sounds very delicious but didn't quite meeting the healthy treat I was aiming for.
To give the bars a bit extra flavour I added some golden syrup, which was the best decision, it really blended well with the rice flakes, chopped walnuts and cut up raisins, sultanas and dates, I also added some coconut! The only thing that I would change next time is the amount of butter. The original recipe, which I was using as a base called for 1/2 cup melted butter, it made the bars taste delicious and almost had the cornflake patty like taste that my gran used to make as a child, but it also gave it that buttery bottom, on each bar. So instead of 1/2 cup of butter, particularly if like me, your aim is for a healthy treat I would add 1/4 cup of butter, with the golden syrup it should still blend in quite well! I also cut the bars after they were set into long rectangles, you could also cut in half again and they would make great lunch box treats, which would look the same as all the other kids bars, but gluten free!
Without further ado here is the recipe,
GF Fruit & Nut Healthy Bars

Ingredients:
3 cups of crushed gf riceflakes or gf cornflakes (whatever is in the cupboard)
2/3 cups finely chopped dried fruit (I used sultanas, raisins and dates, that's what was in my cupboard, you could also use apricots, apples or cranberries, whatever is in your cupboard, if you have to buy something the remainder will get eaten)
2-3 tablespoons of finely chopped almonds (or other non salted nuts you have in your cupboard)
1/3 cup desiccated coconut (my addition)
1/3 cup icing sugar
1/3 cup melted butter
1 tablespoon of golden syrup (be generous, let it overflow a bit!)
Method:
Crush riceflakes or corn flakes (I put them in a bowl and used the back of the spoon, it worked quite well, don't blend as you don't want it too fine). Mix in finely chopped nuts fruit, nuts, icing sugar, coconut, melted butter and golden syrup, mix well.
Line a slice tray with baking paper and place mixture into the tray, use the back of a wooden spoon, to ensure that it is all flat and even.
Place bars in the fridge until set. Once set, cut bars into long rectangular shapes, then cut in half. This makes it easier for lunch box treats. Store in tray or airtight container in the fridge, depends how quickly they get devoured!
Note; if you are making these for your child to take to school, ensure that it is not a peanut free school, just ask their class teacher. If this is the case and your child can eat nuts, save them for afternoon tea treats! However if your child is allergic to nuts, simply add some pumpkin or sesame seeds to bulk it up, the same amount as the nuts. If you want to use the whole 1/2 cup of butter, these would also make great treats in patty or cup cake liners, refridgerate after putting them in their liners, for Christmas you could always use the Christmas cupcake liners! Let me know how it goes!
Also don't forget about the amazing competition at delicieux http://www.ledelicieux.com/ , the food blogger is running, you can win fantastic bottles of De Bortlio wines, it's also packaged in amazing Bohemia art boxes! Makes for great Christmas gifts!
I'm also on twitter you can follow me @MMOAGFL, don't forget the Facebook page and click on like it if you enjoy the blog! It's fantastic to read my blog and it is amazing to follow, if you don't have a gmail account, you can get my posts directly by email, fuss free, no searching straight to your inbox!
Enjoy
xxxx
Wednesday, 7 December 2011
Butterscotch Scnapps & White Flesh Nectarines Summer Cocktail!
I was over the moon yesterday, when I received an email from Nuffnang, personally inviting me to participate in a food blog competition! A chance to win an chance to attend the foodathon at the Stokehouse in Melbourne! I'm finally a real food blogger, being invited to events and participating in blog hops! Its taken nearly 6 months but it was well worth the wait!
The competition is in conjunction with Schwepps and to enter you have to create a cocktail using a Schwepps drink as one of the base ingredients!The amazing price is a paid flight to Melbourne and a nights accommodation! Wow!
For my readers my last year and a bit hasn't been filled with the best of luck (aside from marrying the man of my dreams almost a year ago!), I haven't had the best of luck to say the least (I don't want to go into details, lets just say it involves numerous injuries, not being able to work, two surgeries and another hospital stay). But I think of myself as lucky, things could have been worse and so many people have worse injuries or conditions then mine, I'm grateful I'm alive and not worse off. But to win, to change my luck would be truely amazing, encouraging and inspiring, it would tell us all that there is light at the end if the tunnel, my luck can change!
I got this email on Tuesday and immediately got started thinking about what cocktail I would create. I did a quick mental note of the cocktails I've drunk and liked in the past! But the key that I wanted to do with my cocktail creation was to make it original, something that you wouldn't go to your local bar and ask for. My inspiration was seasonal (though the weather at the moment suggests otherwise), with particular focus on the fruits of summer. I then thought of what Schwepps drinks I like the most, find the most refreshing in summer. The conclusion I came to was the fruit I was going to use is white flesh nectarine (with skin on), I then thought of what spirits would taste nice with nectarine, I already had Butterscotch Schnapps, actually I think the spirit was were I first started. The Schewepps lemonade was the most obivious choice with my combination, I wanted the two flavors to come through not be overwhelmed by the mixing drink.
The next addition to my delicious summer cocktail was lots and lots of ice, ice is the key to any refreshing summer cocktail! The best thing about a summer cocktail, is to taste the lovely flavours but without being hit with the overwhelming alcohol flavor! When blending, leave little chunks of ice, it makes the cocktail that more refreshing, chewing on the mini chunks of ice, absorbed by the cocktail flavor, is pure heaven! Guaranteed to have you wanting some more of the Schwepervesence of this delightful refreshing cocktail! The best thing about this cocktail is that it doesn't overwhelm you with the flavor of alcohol, but they refreshing and delightful blend of white flesh nectarines and Butterscotch Shnapps, complimented by the Schwepps Lemonade! I hope you enjoy this cocktail as much as I did! To make more for a party, simply double the mixture!
After much thought the name of this delicious cocktail is:
Serves 2 Cocktail glasses
 Ingredients:
2 chopped white flesh nectarines with the skin on
45ml of Butterscotch Schnapps
2 cups of lemonade
2 handfuls of ice.
Method: Place all ingredients in blender, mix on high until ingredients is blended through. The cocktail will give a fluffy fuzz like texture, this is how it is meant to be! Place in a pre chilled cocktail glass and serve with a colorful straw. Enjoy Xx
The competition is in conjunction with Schwepps and to enter you have to create a cocktail using a Schwepps drink as one of the base ingredients!The amazing price is a paid flight to Melbourne and a nights accommodation! Wow!
For my readers my last year and a bit hasn't been filled with the best of luck (aside from marrying the man of my dreams almost a year ago!), I haven't had the best of luck to say the least (I don't want to go into details, lets just say it involves numerous injuries, not being able to work, two surgeries and another hospital stay). But I think of myself as lucky, things could have been worse and so many people have worse injuries or conditions then mine, I'm grateful I'm alive and not worse off. But to win, to change my luck would be truely amazing, encouraging and inspiring, it would tell us all that there is light at the end if the tunnel, my luck can change!
I got this email on Tuesday and immediately got started thinking about what cocktail I would create. I did a quick mental note of the cocktails I've drunk and liked in the past! But the key that I wanted to do with my cocktail creation was to make it original, something that you wouldn't go to your local bar and ask for. My inspiration was seasonal (though the weather at the moment suggests otherwise), with particular focus on the fruits of summer. I then thought of what Schwepps drinks I like the most, find the most refreshing in summer. The conclusion I came to was the fruit I was going to use is white flesh nectarine (with skin on), I then thought of what spirits would taste nice with nectarine, I already had Butterscotch Schnapps, actually I think the spirit was were I first started. The Schewepps lemonade was the most obivious choice with my combination, I wanted the two flavors to come through not be overwhelmed by the mixing drink.
The next addition to my delicious summer cocktail was lots and lots of ice, ice is the key to any refreshing summer cocktail! The best thing about a summer cocktail, is to taste the lovely flavours but without being hit with the overwhelming alcohol flavor! When blending, leave little chunks of ice, it makes the cocktail that more refreshing, chewing on the mini chunks of ice, absorbed by the cocktail flavor, is pure heaven! Guaranteed to have you wanting some more of the Schwepervesence of this delightful refreshing cocktail! The best thing about this cocktail is that it doesn't overwhelm you with the flavor of alcohol, but they refreshing and delightful blend of white flesh nectarines and Butterscotch Shnapps, complimented by the Schwepps Lemonade! I hope you enjoy this cocktail as much as I did! To make more for a party, simply double the mixture!
After much thought the name of this delicious cocktail is:
Serves 2 Cocktail glasses

2 chopped white flesh nectarines with the skin on
45ml of Butterscotch Schnapps
2 cups of lemonade
2 handfuls of ice.
Method: Place all ingredients in blender, mix on high until ingredients is blended through. The cocktail will give a fluffy fuzz like texture, this is how it is meant to be! Place in a pre chilled cocktail glass and serve with a colorful straw. Enjoy Xx
Monday, 5 December 2011
Chocolate Pavolova for the Pavolova Blog Hop
I'm very excited, not only have I found new food bloggers, I've joined Twitter! If you would like to follow me my twitter name is MMOAGFL, I already have followers in the first few hours of joining! It feels like when I first started to blog and people began to read my blog. Speaking of that a very warm welcome to my national and international readers from; USA,Cananda, Singapore, Russia, France, Japan, Germany,UK and Colombia!, and that's just from this month!
I've also participated in my very first blog hop! It's a food one, sharing the best pavolova recipes! It's hosted by the amazing food blogger at Delicieux http://www.ledelicieux.com/2011/11/25/black-forest-pavlova/, if you wish to join, clink on the above link to get inspiration for the numerous variations of pavolovas and even make your own! For people who are unsure what it is it is a meringue based dessert with cream and fruit, it has come somewhat of a national icon and even features in one of the most famous children's books Possum Magic!(a famous childrens novel by the talented Mem Fox, a childhood favourite!).Recently there has been some debate if the dish is national to Australia or New Zealand, personally I don't care, it's a national dish now, that most people love, let both countries claim it if they like.
I had so much fun creating my own unique pavolova, I looked at others for inspiration, I even looked up my mums old 1970s cookbook, to see how they used to get them such a perfect! You see this is the first pavolova I've made from scratch, I've used the pre made bases and decorated with cream, fruit and chocolate but this was the first I made from scratch.
I got out my grandmothers Kenwood mixer, an inherited beloved and much used item! It would have to be 60 years old!, everything is so heaving,it's ceramic, not like the plastic designs of today! Sadly my grandmother passed away nearly 5 years ago from cancer, she loved to bake and using her mixer made me feel like she was with me, guiding me and making sure this pavolova would turn out ok! I even began to think like my grandmother and got out the eggs a few hours before to ensure they were at room temperature. Gran was a great cook and nothing seemed to stress her while baking, so when I only had 1 cup of caster sugar, something told me that wasn't quite enough, so I got out the icing sugar, I wanted the soft sweet texture, not grainy texture of normal sugar. I was right, the icing sugar made it perfect!

I wanted to try something a little different, I had lots of inspirations from other bloggers and recipes and I decided on a chocolate pavolova! But the chocolate wouldn't stop there it continued in the cream, which I added Balieys too as well as the dark chocolate! I thought the process through well and even chatted to my bestie, a non pavolova loving gal, even she was inticed by the chocolate and the non traditional nature of my pav! I think it was the chocolate!
The first bite of the pavlova was pure heaven, I got it perfect! It was crunchy on the outside but had that soft chewy like texture in the middle, combined with an expolsion of baileys and chocolate cream and a mouthful of berries! I knew with that first bite that gran had been guiding me and she helped me to make the dish taste and turn out delicious as it did. It made all the piping of messy chocolate meringue, to get a nice shape pav, but messy hands well worth it.
Theres something almost magical, tracending about baking, it moves you to another place, where all your focused on is the subject at hand! Its quite stress relieving, whilst also giving you a feeling of importance and apprehension at the same time. Apprehension about if it will be a success or a gf mishap an experience to learn from or will you glow with pride and self importance as you plate up and serve your dish to your loved ones!
Before I share my lovely recipe with you I would like to thank my new food bogging friends as I embark on my first blog hop, or should I say pavolova blog hop! I hope you enjoy this as much as I did, and my family too. I've read various people say that they only use egg whites snd sugar to create the pav, no cornflower, vinegar or salt, so if the second tine you cook this you want to try it like that please let me know if it turns out and what it tastes like! Without further ado here is my chocolate and berry pavolova with baileys and chocolate cream recipe;
GF Chocolate and Berry Pavolova with Bailieys and Chocolate Cream
 Ingreidents:
4 egg whites
1 cup caster sugar
1/4 cup icing sugar
1/3 cup sifted cocoa
1 teaspoon gf cornflour
1 teaspoon white vinegar
pinch salt
300ml thickened cream
1/4 cup Baileys
8 pieces melted dark chocolate
Blueberries
Strawberries
Cherries
Method:
Separate the eggs individually, whisk on high, adding eggs one at a time. Whisk until soft peaks form. Add caster sugar, 1 tablespoon at a time, to ensure it is mixed through, add the icing sugar in the same manner until shiny, glossy peaks form. Add sifted cocoa, cornflour, vinegar and saltm fold into meringue mixture.
Draw a 23cm circle on baking paper. Using a spoon and knife, spread dollops of mixture around the entire circle. Pipe remaning mixture around the entire circle, in two layers (see picture if unsure). Add a bit more mixture to the centre. Cook on 140 degrees celicus for 40 minutes or until firm (I turned the oven off and left the door open a bit and let it cook a little bit more for 5 minutes).
Cool the merinuge, it should look like this:

For the cream, whisk a small carton 300ml of thickened cream with 1/4 of a cup of Bailieys or to your liking. Whisk until peaks form. Melt dark chocolate in the microwave, for 30 seconds at a time, mix, careful not to burn the chocolate. Fold melted chocolated through the cream. Add the cream to the centre of the merinuge, making the pavolva! Decorate with berries, I strategically placed, blueberries, cherries and strawberries on my pavolova!
Note: I couldn't resist but this was a little rich immediately after adding the cream, but the next day, when the flavours had blended through tasted much nicer. So something I would recommend making the day before you need it.

Enjoy
xxx
I've also participated in my very first blog hop! It's a food one, sharing the best pavolova recipes! It's hosted by the amazing food blogger at Delicieux http://www.ledelicieux.com/2011/11/25/black-forest-pavlova/, if you wish to join, clink on the above link to get inspiration for the numerous variations of pavolovas and even make your own! For people who are unsure what it is it is a meringue based dessert with cream and fruit, it has come somewhat of a national icon and even features in one of the most famous children's books Possum Magic!(a famous childrens novel by the talented Mem Fox, a childhood favourite!).Recently there has been some debate if the dish is national to Australia or New Zealand, personally I don't care, it's a national dish now, that most people love, let both countries claim it if they like.
I had so much fun creating my own unique pavolova, I looked at others for inspiration, I even looked up my mums old 1970s cookbook, to see how they used to get them such a perfect! You see this is the first pavolova I've made from scratch, I've used the pre made bases and decorated with cream, fruit and chocolate but this was the first I made from scratch.
I got out my grandmothers Kenwood mixer, an inherited beloved and much used item! It would have to be 60 years old!, everything is so heaving,it's ceramic, not like the plastic designs of today! Sadly my grandmother passed away nearly 5 years ago from cancer, she loved to bake and using her mixer made me feel like she was with me, guiding me and making sure this pavolova would turn out ok! I even began to think like my grandmother and got out the eggs a few hours before to ensure they were at room temperature. Gran was a great cook and nothing seemed to stress her while baking, so when I only had 1 cup of caster sugar, something told me that wasn't quite enough, so I got out the icing sugar, I wanted the soft sweet texture, not grainy texture of normal sugar. I was right, the icing sugar made it perfect!

I wanted to try something a little different, I had lots of inspirations from other bloggers and recipes and I decided on a chocolate pavolova! But the chocolate wouldn't stop there it continued in the cream, which I added Balieys too as well as the dark chocolate! I thought the process through well and even chatted to my bestie, a non pavolova loving gal, even she was inticed by the chocolate and the non traditional nature of my pav! I think it was the chocolate!
The first bite of the pavlova was pure heaven, I got it perfect! It was crunchy on the outside but had that soft chewy like texture in the middle, combined with an expolsion of baileys and chocolate cream and a mouthful of berries! I knew with that first bite that gran had been guiding me and she helped me to make the dish taste and turn out delicious as it did. It made all the piping of messy chocolate meringue, to get a nice shape pav, but messy hands well worth it.
Theres something almost magical, tracending about baking, it moves you to another place, where all your focused on is the subject at hand! Its quite stress relieving, whilst also giving you a feeling of importance and apprehension at the same time. Apprehension about if it will be a success or a gf mishap an experience to learn from or will you glow with pride and self importance as you plate up and serve your dish to your loved ones!
Before I share my lovely recipe with you I would like to thank my new food bogging friends as I embark on my first blog hop, or should I say pavolova blog hop! I hope you enjoy this as much as I did, and my family too. I've read various people say that they only use egg whites snd sugar to create the pav, no cornflower, vinegar or salt, so if the second tine you cook this you want to try it like that please let me know if it turns out and what it tastes like! Without further ado here is my chocolate and berry pavolova with baileys and chocolate cream recipe;
GF Chocolate and Berry Pavolova with Bailieys and Chocolate Cream

4 egg whites
1 cup caster sugar
1/4 cup icing sugar
1/3 cup sifted cocoa
1 teaspoon gf cornflour
1 teaspoon white vinegar
pinch salt
300ml thickened cream
1/4 cup Baileys
8 pieces melted dark chocolate
Blueberries
Strawberries
Cherries
Method:
Separate the eggs individually, whisk on high, adding eggs one at a time. Whisk until soft peaks form. Add caster sugar, 1 tablespoon at a time, to ensure it is mixed through, add the icing sugar in the same manner until shiny, glossy peaks form. Add sifted cocoa, cornflour, vinegar and saltm fold into meringue mixture.
Draw a 23cm circle on baking paper. Using a spoon and knife, spread dollops of mixture around the entire circle. Pipe remaning mixture around the entire circle, in two layers (see picture if unsure). Add a bit more mixture to the centre. Cook on 140 degrees celicus for 40 minutes or until firm (I turned the oven off and left the door open a bit and let it cook a little bit more for 5 minutes).
Cool the merinuge, it should look like this:

For the cream, whisk a small carton 300ml of thickened cream with 1/4 of a cup of Bailieys or to your liking. Whisk until peaks form. Melt dark chocolate in the microwave, for 30 seconds at a time, mix, careful not to burn the chocolate. Fold melted chocolated through the cream. Add the cream to the centre of the merinuge, making the pavolva! Decorate with berries, I strategically placed, blueberries, cherries and strawberries on my pavolova!
Note: I couldn't resist but this was a little rich immediately after adding the cream, but the next day, when the flavours had blended through tasted much nicer. So something I would recommend making the day before you need it.
Enjoy
xxx
Subscribe to:
Posts (Atom)